“SW Print Manager” is a standalone application to print SolidWorks drawings. It also has SolidWorks add-in which enables the Print Manager launching from SolidWorks UI. The application automates the process of printing multiple SolidWorks drawing files.
Once configured for printers and paper sizes, it needs few steps to print large set of different drawings. It can be configured to map sheet sizes to various print paper sizes on difference printers.
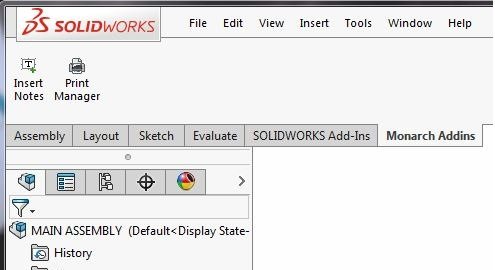
SW Print Manager can be launched either from the Solid works User Interface Or from the desktop shortcut and programs menu.
Open an Assembly/Part/Drawing file

Go to Add-Ins > Print Manager > Print
Following figure displays the application main window, when we open first time.

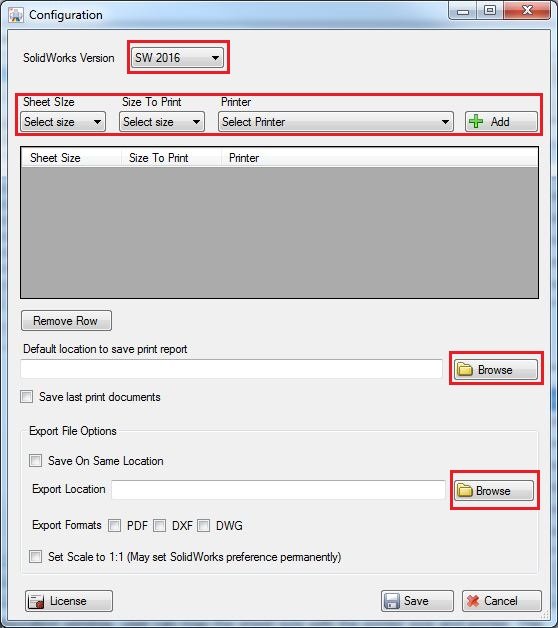
The image shows the configuration window.

1. Select the Solid works Version.
2. Map the sheet size with the printer size and printer.
3. The selected sheet will print to the specified print in specified paper.
4. Configure the default location to save the print report.
5. Specify the Export location (this option is generally use for export the files in specify location).
6. Save the Settings.
7. Restart the SW Print Manager.
Following figure shows the configuration setting after setting parameter.

Then click on print button to print the selected files.


 Go to Add-Ins > Print Manager > Print
Following figure displays the application main window, when we open first time.


 1. Select the Solid works Version.
2. Map the sheet size with the printer size and printer.
3. The selected sheet will print to the specified print in specified paper.
4. Configure the default location to save the print report.
5. Specify the Export location (this option is generally use for export the files in specify location).
6. Save the Settings.
7. Restart the SW Print Manager.
Following figure shows the configuration setting after setting parameter.


Reviews
There are no reviews yet.